I'm starting a .com called www.JuJuCrafts.com -- should be up soon ... but ...... in order to match it thought I should just start fresh and new ... would love it if you would come over and subscribe or follow ... there will also be YT videos and tutorials and giveaways!!! The first GiveAway will be a Tim Holtz originals die probably at the end of Nov or 1st week of Dec. is the plan .. the new blog is at:
www.MyJuJuCrafts.blogspot.com
would love to see you there. The first post is up already! An altered wood WITCH word.
Saturday, October 12, 2013
Thursday, October 10, 2013
Giant Skull Tag - Chunky Charm Dangle on Tim Holtz Lantern Die - - Handmade Witch Wand
Been having some fun on some recent Halloween projects and thought I'd post them to share. For a chunky charm dangle swap with creative presentation, here's the Tim Holtz Lantern all gummed up and the dangle.
 |
the light is just a self-lit tea light for Halloween Jack-o'-Lanterns The next two projects were challenges from The Craft Hole, a FB crafting group 
Trash to Treasure Challenge - took a bent metal clothes hanger and made a wand! Transformed with acrylic glue, alcohol inks, paint, resin, beads and findings
The one below was a challenged called The Skull vs The Craft Hole, a variety of stamped images had to be used. So I decided to take a Halloween Steampunk twist :) - the size of the tag is a 5"x7"     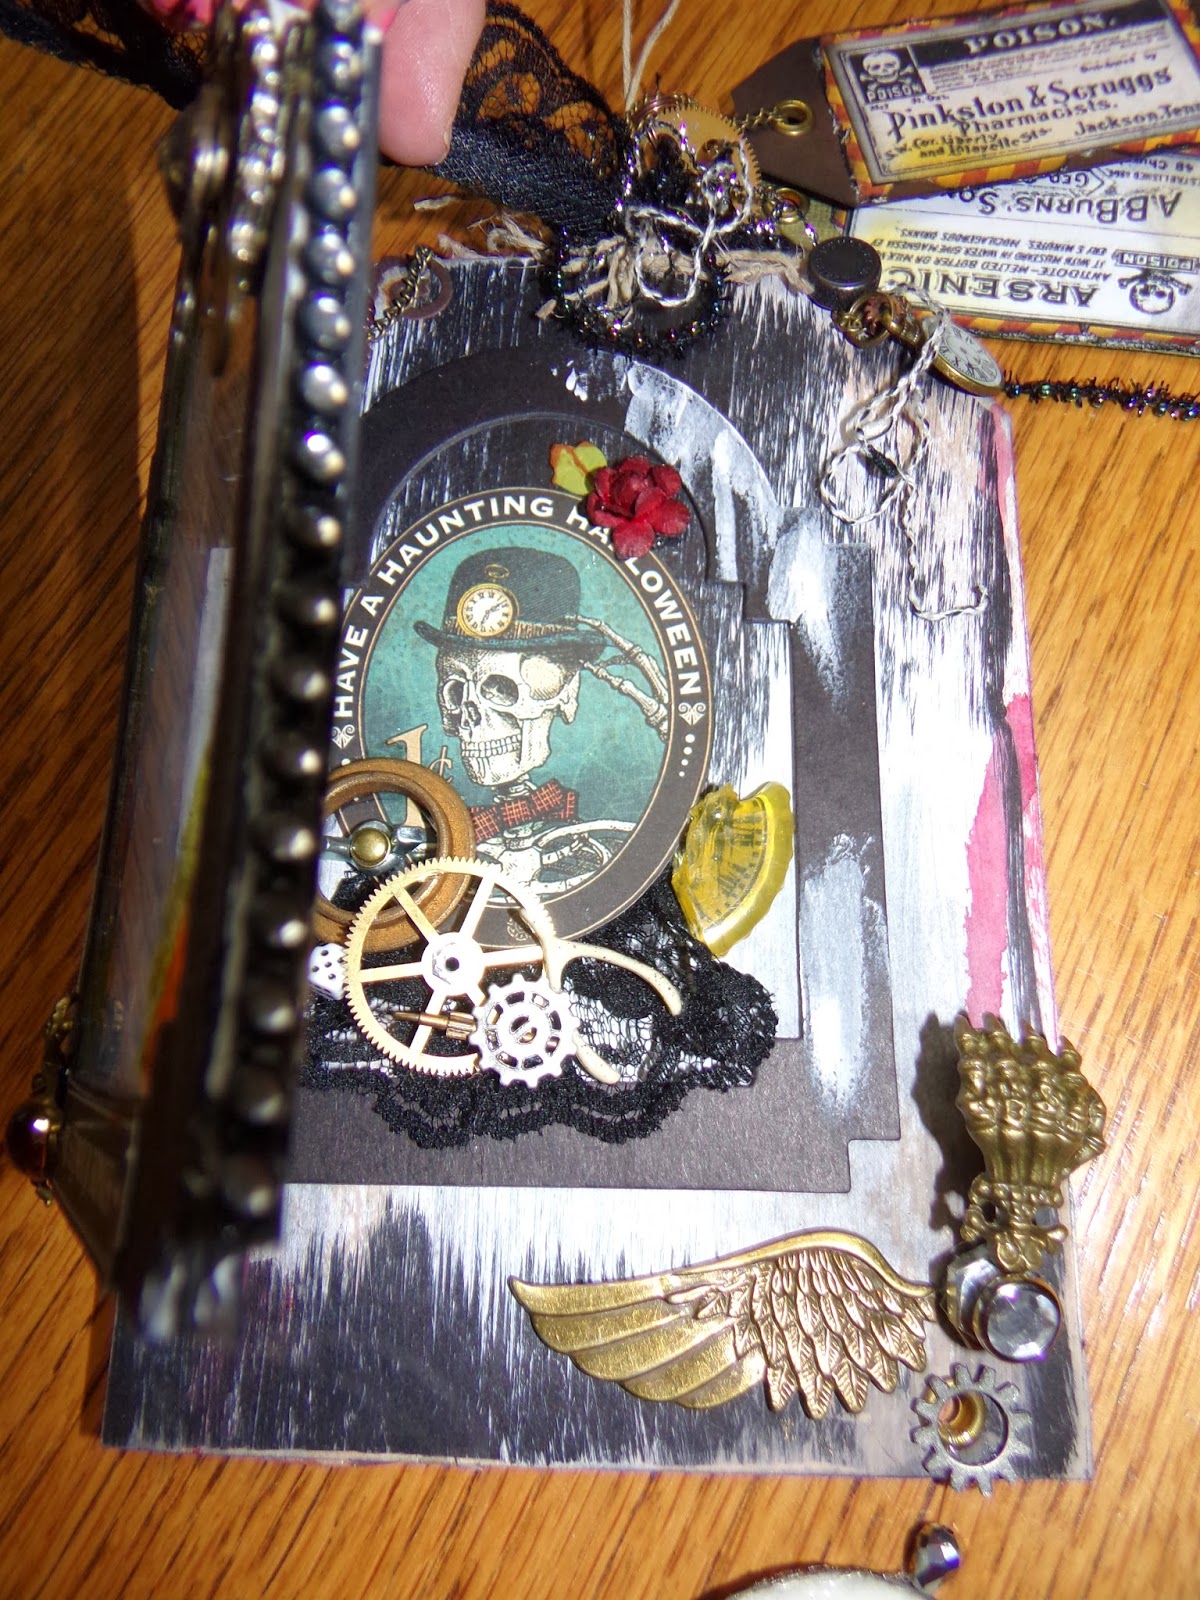  |
Friday, August 30, 2013


Sunday, August 25, 2013
Reinforced Strong Handmade Scrapbook or Mini Album Book Binding using the STACKED DECK HIDDEN HINGE - Photo Tutorial
I love LOVE making mini albums - I hate when after 20 people look through them the pages start tearing off the binding. There may be other solutions but this is what I've been using. I was surprised to see that Anna Rostad (If you ever want to be inspired look at her works http://www.annespapercreations.com) also uses a similar technique. I combined several videos found on YouTube on bindings techniques (combining Hidden Hinge and Stack the Deck bindings (please watch this lady's video on the how to initially make it http://www.youtube.com/watch?v=z5cRBlfVnLo and added some reinforcing :
 First - get yourself one of those Tyvek mailers (or a piece of Tyvek from the hardware store) they're the ones that are hard to tear but they're a different material than paper. Tyvek /taɪˈvɛk/ is a brand of flashspun high-density polyethylene fibers, a synthetic material; the name is a registered trademark of DuPont. The material is very strong; it is difficult to tear but can easily be cut with scissors or a knife. Water vapor can pass through Tyvek (highly breathable), but not liquid water, so the material lends itself to a variety of applications: envelopes, car covers, air and water intrusion barriers (housewrap) under house siding, labels, wristbands, mycology, and graphics. (per Wikipedia)


Now for MORE reinforcing!!! ... cut another piece of Tyvek and another piece of paper the same size as your binding. Glue the Tyvek to the paper (this paper will be what everybody sees as your spine. (Don't glue the binding and the spine papers together yet -- Just the Tyvek to the spine paper. Let dry completely.


Cut the Tyvek and a piece of cardstock the same size (the color you choose will be inside your book).Cut them as tall as your mini album will be (say a 6" mini album would need a piece of cardstock and Tyvek 6" tall and a minimum of 11" long for a 5 page mini album) glue the 2 pieces together using a STRONG glue .. NO glue sticks!! I like E6000 spray but some people don't, you can use whatever you like as long as it will give a good bind without being bulky. Let dry thoroughly. If you are using the E6000 spray, remember to spray completely on one of the pieces and press hard, keep pressing occasionally and let dry COMPLETELY before moving to the next step (usually about 4-5 minutes with the E6000 spray).

This is where watching the video in the first paragraph comes in handy. Leave at least 1 1/2" or more on each end. I start in the middle of my paper and work to the edges. Score in the middle (remember, if you don't have a score board you can use the little divet in a paper slicer to run a score line down paper using a stylus ). On each side of the middle, do a 1/2" score .. then a 1/4" score, then a 1/2" score, another 1/2" score, then 1/4", then 1/2", then 1/2", then 1/4" ... (if you haven't seen this before PLEASE watch the video http://www.youtube.com/watch?v=z5cRBlfVnLo
This lady explains why this version is one of the best and how to do it.
On the back side, where the Tyvek is, put a piece of ScorPal Tape .. or Terrifically Tacky tape -- You can use a strong glue if you use several clips till totally dry.
This creates the bindings where you will be attaching your pages.
I'm making two bindings for 2 different books at the same time -- that's why you will see two in the pictures.

Fold the ridges back and forth to get them limbered-up for the turning of your pages (don't forget that little 1/4" on each end before you get to the 2" space on the very end too ... that will be the one that will hold your front and back covers. (The 2 inch unlined areas are what you attach to your front and back covers).

Now for MORE reinforcing!!! ... cut another piece of Tyvek and another piece of paper the same size as your binding. Glue the Tyvek to the paper (this paper will be what everybody sees as your spine. (Don't glue the binding and the spine papers together yet -- Just the Tyvek to the spine paper. Let dry completely.

If you want to emboss your spine, now's the time to do that. You only have to emboss the center you will be seeing behind the pages (I ran these through a Tim Holtz Halloween embossing folder) and then put a drip of white acrylic paint on a paper towel and lightly brushed over the embossed image.

(sorry it's sideways :P ) when I fold the edges that will be under the front and back covers you can see what my book's spine will look like ... Now Glue (strong glue again or the ScorPal or Terrifically Tacky tape) the binding piece to the spinal cover piece (You will be gluing the 2 Tyvek pieces together). Make SURE you get the edges and corners glued together well.

Press well and clip together or put something heavy on it till it dries completely.

Make sure no glue is seeping out the edges before you clip them

Finally, use a Sharpie (or other permanent marker)-- or even better, use alcohol ink (such as Tim Holtz Adirondack Inks) to fill in the white/red colors of the Tyvek that are peaking out and there you have a great reinforced binding for your custom handmade mini album.
Once I finish one of these albums I'll post it up.
HOPEFULLY ... I'll be done before Halloween!!
HAPPY CRAFTING!
Craftng TIPS keeping it clean
There are 2 disposable things I feel like have now become a necessity when crafting.
First, from your local newspaper office ask to buy the end rolls (the rolls that are way too small for them to print the newspaper on). Many newspaper offices sell these extremely cheap or even give away free if you ask them to save them for you. This way you have an endless supply of clean paper to work on, let the kids / grandkids craft on, or let them draw and paint on this paper. Another benefit, that AWESOME thick cardboard core in the middle!!! Hacksaw your circle for sturdy, huge spools, or any craft that you need a big, stiff circle:
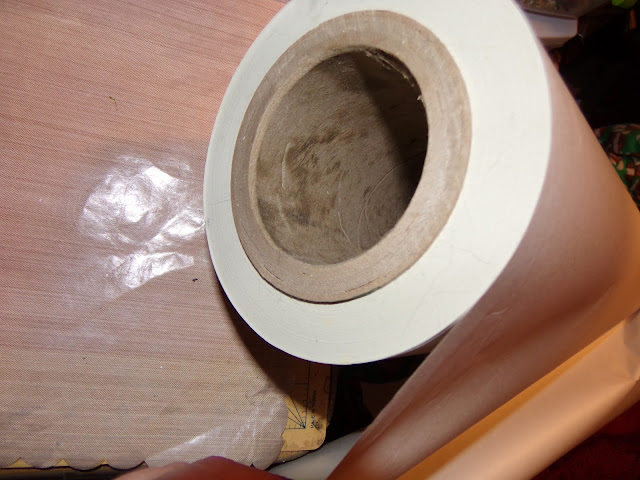 I picked up this big roll from the Morning News newspaper in Blackfoot, Idaho for $3 !!! It will last me several years!
Another item that no crafter should be without if you use resin, glue, alcohol inks or paints ... a BIG box of disposable gloves. These are easily found in your local pharmacy or department store. Usually you will find them in the Pharmacy areas with the diabetic supplies. Watch for the $5 and $10 off coupons in the store's ads. After a $10 off coupon in their monthly ad I paid less than $5 for this entire box at my Walgreens (like a Rite Aid for you east coasters). They come in Latex and non-Latex for those that have allergies, also you can get them powdered or not. Slip on a pair and do ALL your dirty work and dispose quick in the trash. If you're using alcohol inks and paints, you can just reuse that pair several times to save $.

First, from your local newspaper office ask to buy the end rolls (the rolls that are way too small for them to print the newspaper on). Many newspaper offices sell these extremely cheap or even give away free if you ask them to save them for you. This way you have an endless supply of clean paper to work on, let the kids / grandkids craft on, or let them draw and paint on this paper. Another benefit, that AWESOME thick cardboard core in the middle!!! Hacksaw your circle for sturdy, huge spools, or any craft that you need a big, stiff circle:

Another item that no crafter should be without if you use resin, glue, alcohol inks or paints ... a BIG box of disposable gloves. These are easily found in your local pharmacy or department store. Usually you will find them in the Pharmacy areas with the diabetic supplies. Watch for the $5 and $10 off coupons in the store's ads. After a $10 off coupon in their monthly ad I paid less than $5 for this entire box at my Walgreens (like a Rite Aid for you east coasters). They come in Latex and non-Latex for those that have allergies, also you can get them powdered or not. Slip on a pair and do ALL your dirty work and dispose quick in the trash. If you're using alcohol inks and paints, you can just reuse that pair several times to save $.

Romantic Steampunk Dangle with Corset Box Presentation (Blue and Purple
Finished up the Romantic / Sexy Steampunk dangles and presentations so I'm sharing a few photos -- With the autumn air sending cool breezes, I'm catching the holiday crafting flu --- Halloween and Christmas is all I can think of these last few days, definitely time to start planning the fun stuff!!


Tuesday, August 20, 2013
Dollar Store Skeleton -- Altered for Halloween
Inspired by a YouTube video I discovered by Brad Goodspeed on overhauling a large skeleton (which I highly recommend you watch - soooo many amazing ideas in his works) http://www.youtube.com/watch?v=VCA2Ol9B5As
I spent a total of 20 minutes and took a little skeleton (you get a string of 5-10 of these for $1 at most Dollar Stores around Halloween) and using my embossing gun heated and bent him up, hotglue was dripped and pulled while still hot and then color added with Tim Holtz Adirondack inks -- made a most impressive change!! This guy is getting implemented in the Halloween Spellbook I'm working on:
Here's a Before and After pic :)

Sunday, August 18, 2013
Steampunk Witch Mini Altered Dresser for Halloween - inspired by Graphic 45 Steampunk Spells Papers, Stampin' Up, and Tim Holtz dies
Years ago I thought of making a scary dollhouse and ordered the Matchbook die from Stampin' Up to make a dresser and some other creations, but like most of my procrastinated craft dreams, I just stuck it in the hoard. Re-inspiration hit when I attended a Girls' Night Out at the Stinkin' Cute Scrapbook Shop and Boutique in Blackfoot, Idaho. My friend and super craft lady, Andrea (http://talkinghorsesarts.blogspot.com/) had made a chest of drawers that reignited the flame. I die cut 6 matchbook boxes (the ones from the Stampin' Up die are larger than actual match boxes), glued them together in a side by side dresser shape and reinforced the sides with chipboard. Then, glued scrunched up tissue paper around the sides and used Tim Holtz Headstone die for the mirror. Added a bunch of embellishments from my stash and adored it!


Tim Holtz On the Edge Graveyard die was used on each side - die cut the shapes twice in chipboard and glue them together for more dimension. After painting them with black gesso, I just rubbed my finger with some silver Kryon marker and rubbed on the tops of the tombstones. This is also how I treated the plastic flatback pearls around the top edge and the "mirror" with the steampunk image.


Decided to throw a few embellies on the back just in case somebody turned it around

There are "surprises" in each drawer - drawers are lined with red velvet and G45 Steampunk papers

Little plastic skull beads (painted black and touched with silver) glued onto copper square brads with some E6000 glue work as drawer pulls. Burgundy red beads and a little metal lantern hang from a chain that's threaded through some smashed out bead caps that I glued to the front corners.

Two tiny Prima gears are glued on the lady's hat .. a clock gear was inserted into the skull bead (E6000 glue keeps it there)

The Ouija board is just an internet image printed out and coated with Glossy Accents onto a frame, the Crystal Ball is a clear/cracked bead glued onto a Prima Junkyard finding "nut", and the little bottle has a Swarovski crystal wired to the side with the label cut from the packaging of K&Co. apothecary labels. The packaging showed miniature images of what was inside the pack and are a much nicer size for tiny bottles. Adirondak black alcohol ink added the creepy darkness to the bottle and to the bent birdcage hook.

And for EXTRA fun, the bottle is filled with a Glow in the Dark Gel Medium -- makes it more fun to turn off the lights :)
thanks for lookin'
Wednesday, August 7, 2013
Steampunk Dangle and "Tag" using Tim Holtz Pocketwatch die
Here's the 2nd video I've ever made .. working on the "howtos"
http://www.youtube.com/watch?v=wcHXXrP9p_k
http://www.youtube.com/watch?v=wcHXXrP9p_k
Saturday, July 6, 2013
charm give away winners
Hi my name is Amber I am Lisa's niece.........I got to pick random names and the first prize winner is...........MawMawAngela.........the second prize winner is raven...........send Lisa what address you want your prize sent to..........
Friday, June 21, 2013
CHARM GIVE-AWAY !! OVER 60+ CHARMS / EMBELLISHMENTS - Tim Holtz, Steampunk, Birds, More
Here's the promised Give-Away!! Either my son or niece will pick 2 people from my blog followers on July 1st for a surprise charm pack. The first drawn name will receive the 60+ pieces shown in the pictures below and the second name will receive a 10+ pack (similar charms as in the pics) -- If you want to be eligible just join the blog :) ... I'll mention the winners in a blog post around July 1st or 2nd and send them a private msg to get what address they want me to mail their package .. Hope you're all having a great crafty summer.


 |
| The ones with color and a hole in the center are grommets from We R Memory Keepers. The Tim Holtz vintage pins have the tiny words "Treasure" and "Trinket" engraved. Each square is one-inch so you can get an idea of the size of the charms. |


Monday, June 10, 2013
Mad Hatter's Hat Charm - Alice in Wonderland - Handmade Polymer Clay
Yesterday I was feeling a little yucky and decided to play with clay - Alice in Wonderland is always a cheery thought, so I made some Mad Hatter's Hats and thought they turned out fun! They do have a hole down the middle so they can be hung on a necklace or charm dangle. Yep, I will be making more, they were so gratifying to create. The purple one I put on Listia.com for bidding - it was my favorite and I thought if I got rid of it, I would definitely made more :)


Subscribe to:
Posts (Atom)